
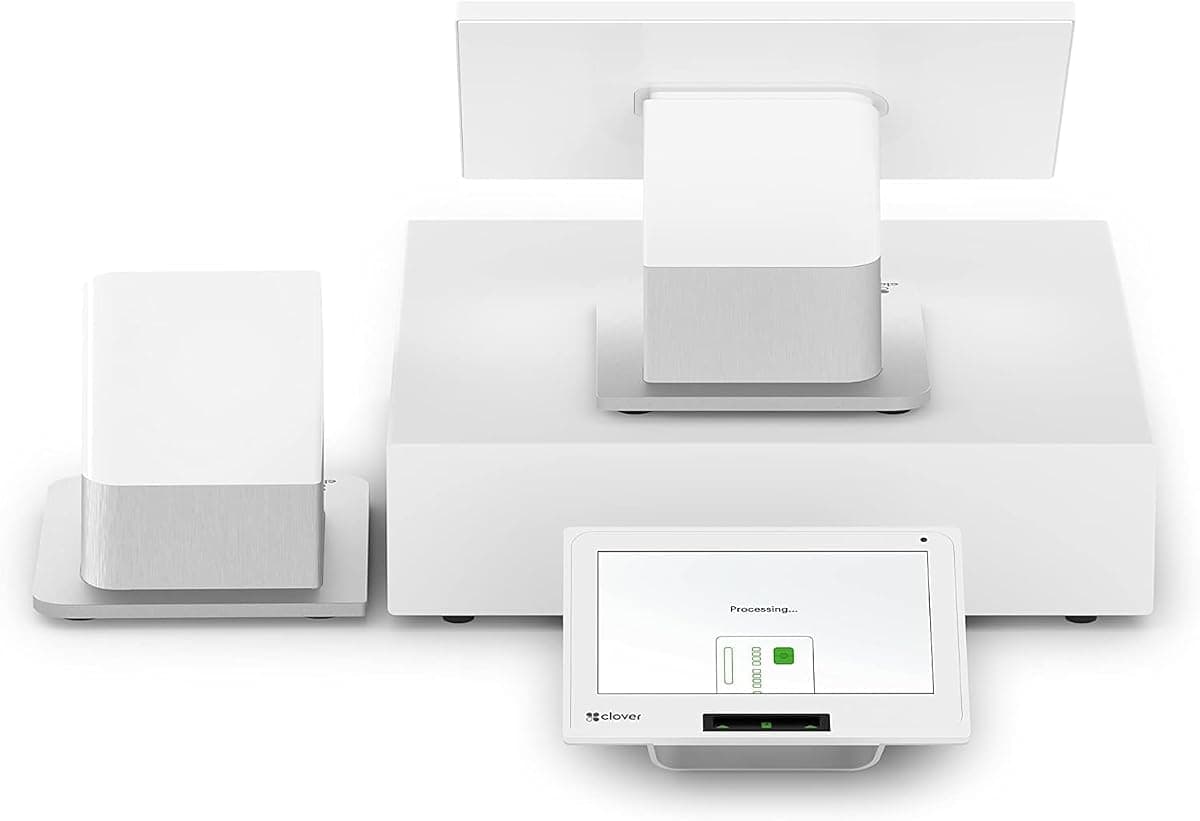
The Clover Station Duo is a countertop point-of-sale system with two screens — a large display for you and a customer-facing display for payments, tips, and receipts. Setting it up is straightforward, and this quick start reference breaks the process into seven simple steps. Follow them in order and you will be taking payments the same day your Clover Station Duo arrives. If you get stuck, our Caribbean Payments team is based right here in Puerto Rico and happy to help.
1.Unbox and connect the merchant and customer displays
- Open the box and lay out the parts: the large merchant display, the smaller customer-facing display, the connecting hub or base, the power brick, and the receipt paper roll. Set the station on a stable countertop with room behind it for cables.
- Seat both displays onto the hub until they click, then run the single connector cable from the customer screen to the merchant screen. Load the receipt paper by opening the printer lid, dropping the roll so paper feeds from underneath, and pulling a short tail out before you close it.
2.Power on and connect to Wi-Fi or Ethernet
- Plug the power brick into the hub and hold the power button until the Clover logo appears. The Station Duo boots straight to a setup wizard on the merchant display.
- For the steadiest connection, plug an Ethernet cable into the hub. If you prefer wireless, tap Settings → Wi-Fi, choose your business network, and enter the password. A wired connection is best for a fixed counter, so use Ethernet whenever it is available.
3.Activate the Station Duo
- When the wizard asks for an activation code, enter the code tied to your merchant account — the one Caribbean Payments sent with your welcome details. This links every sale to your business.
- The station then downloads your merchant profile, menu or item catalog, and any apps in your plan. Let it finish and restart if prompted; this one-time setup only takes a few minutes.
4.Connect the cash drawer and printer
- Plug the cash drawer's cable into the printer port on the hub, then connect the receipt printer if you are using an external model rather than the built-in one. The drawer pops open automatically on cash sales once it is detected.
- Open the Setup app and confirm the drawer and printer show as connected. Run a no-sale to test that the drawer opens, and print a test receipt so you know paper feeds cleanly before customers arrive.
5.Configure taxes and tips
- In the Setup app, open Taxes & Fees and enter your Puerto Rico sales-and-use tax rate so it applies automatically at checkout. You can assign different rates to specific items if your menu needs it.
- Next open Tips to enable on-screen tip prompts on the customer display. Set suggested percentages such as 15, 18, and 20 percent, or turn tips off entirely — the choice is yours and takes seconds to change later.
6.Run a test sale
- Before you go live, ring up a small amount such as $1.00 in the Register app and pay with a card you control — tap, insert the chip, or swipe on the customer display.
- Approve the sale, check that the tip and tax lines look right, then void or refund it from the Transactions screen. A clean approval and reversal confirms your reader, network, and merchant account are all working together.
7.Tips and troubleshooting
- If the station drops offline, re-check the Ethernet cable or reconnect Wi-Fi from Settings. If the customer display goes dark, reseat its connector on the hub — a loose click is the most common cause.
- Install updates when prompted and restart the station weekly to keep it fast. If a card is declined, it is almost always the issuing bank, not the terminal. Anything you cannot solve, our local Puerto Rico support team can walk you through by phone.
Comparing counter systems? Browse our card terminals to see how the Station Duo stacks up against other Clover devices and find the right fit for your business.